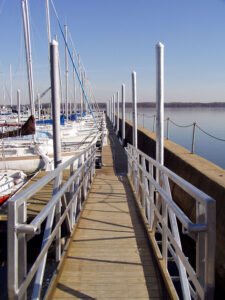
Docks aren’t complicated structures but installing a new one is an undertaking that can be best done with an extra pair of hands. With a few basic tools and a couple friends, your spring dock installation will be much easier!
Start by pre-assembling as much of the dock as possible. This includes all the post clamps, bottom plates and caps for the posts. Visit Website for more information.
The end of winter is the time for docks to get a thorough cleaning before they are put in the water for the summer. It is also the time to make any minor repairs and upgrades. Whether you have a floating dock, or one that is fixed to the shore, a little care will help it stay in great shape all season long.
The best way to protect your investment is by planning ahead. For example, if you plan to have a large boat and want a separate dock for it, consider getting a modular system. This type of dock is more customizable and can be expanded as your family grows. It is also easier to store and repair.
Floating docks are less expensive than fixed systems, and they can be easily removed from the water during the off-season to protect them from ice and harsh weather conditions. This allows them to extend their life span and reduce maintenance costs.
Loading docks are high-traffic areas that require careful coordination between multiple systems and components. Professional installation can ensure that everything from dock levelers and seals to crane and forklift systems works seamlessly together to optimize throughput.
Choosing the right dock height is another important factor in ensuring smooth operations. The ideal dock height is determined by the maximum grade percentage from the loading dock to a vehicle’s bed. Exceeding this limit can lead to equipment hang up, damage to handling equipment, and load spillage. When selecting a dock height, it is helpful to determine what types of vehicles will frequent the facility. This will help in determining the best dock doors for optimum access. In addition, it is often necessary to include space for a truck waiting area on the apron.
Know Your Waterfront
Waterfront properties are not created equal. Some back onto the ocean or a river while others sit along the shores of a lake, pond or man-made reservoir. Each has a unique set of benefits and drawbacks, and it’s important to understand these differences before you start looking for a home on the waterfront.
How you’ll use your property will have a direct impact on what type of waterfront home is right for you. For example, if you want to boat, consider the depth of the water and whether it’s large enough for your particular vessel. Likewise, swimming requires more shallow waters than does fishing, so you’ll need to evaluate the shoreline’s history. Is the water level stable or has it gone up and down in the past?
The quality of the water is another crucial factor. Do any bodies of water in the area have drainage problems or a history of contaminated water? It’s also essential to know how far your property stretches into the water. If you’re interested in building a dock, you’ll need to know if there are any restrictions on mooring.
Most homeowners that purchase waterfront homes do so because they’re attracted to the view. Before you move in, you should fully understand if the view is protected by any buffere requirements or view easements and whether it’s possible to clear or thin trees to enhance the scenery.
Most waterfront properties feature a sea wall or bulkhead and they can need a lot of maintenance. In particular, bowing, cracks, holes behind the sea wall and deteriorating wood pilings can be a problem if not addressed regularly. A comprehensive inspection by a qualified seawall contractor can help you spot these issues early so that you can get them fixed before they become serious.
Move It into the Water
A dock is a major investment, and getting it in place correctly can be daunting. Doing as much prep work as possible ahead of time will save you money, stress and frustration while building your dock. It will also ensure the longevity and durability of your new water access structure.
Most dock kits come with detailed instructions and all the required components to make installation simple and efficient. With some help, even the most inexperienced do-it-yourselfers can easily put their dock together. A good quality kit will also include all of the hardware needed, eliminating the need to run out and purchase additional supplies.
Before moving the dock to the lake, take the time to double-check your fasteners. Whether you’re using framing nails, deck screws, lag bolts or threaded rod, making sure they are straight and evenly spaced will create a more professional finish.
Once the dock is in place, consider using weights to keep it stable and prevent swaying in windy conditions. It’s important to use the right kind of weights. They must be light enough to allow the floater to float on the water’s surface but heavy enough to prevent it from dipping into the water. Popular choices include concrete blocks and metallic balls.
Finally, it’s a good idea to jet the area where you plan on installing your posts. This will help to loosen any sand or silt that might be clogging the bottom of your lake bed, which can cause the posts to sink.
If you’re planning to add accessories like a swim ladder or a boat lift, it’s a good idea to do those at this stage as well. Most modular docks have pre-cut holes for these components, and with a little help can be fitted by just about anyone.
Remove It
With proper planning, safety precautions, and a systematic approach, dock removal can be accomplished in a relatively quick and easy manner. However, like any physical or potentially hazardous project, it’s important to prioritize safety and always check with local authorities and environmental agencies regarding regulations or permits required for the removal process.
One of the most common ways to avoid having to do this labor-intensive chore is to choose a dock that uses modular components for assembly. Once the assembly is complete, simply disconnecting and removing the modular components will allow you to take the entire dock out of the water for seasonal storage. Then, once the weather warms up, you can simply reconnect the tethers and concrete weights, line to shore, and your dock will be ready to go again next year.
Another option is to choose a float dock. While it’s still necessary to do some heavy lifting and moving, a good winch will make the task much easier, allowing you to lift and move the entire dock in one piece rather than in sections. If your dock includes a ramp, it can remain in place and be used for vehicle or boat access throughout the winter.
For a muck bottom, consider using a dredging device such as a long auger to dig down until you reach solid ground. This is a much faster and more efficient way to install the dock than digging by hand.
When taking a dock section apart, it’s important to remove the top black coupler (sometimes called dog bones) before the bottom black poly bolt and nut (the only trick is to tie a string using a slip knot around the exposed nut for retrieval – they don’t float). It’s also recommended that you take out one dock section at a time.